Lofting Attribute (Pro)
Note
Inherited from Generate Attributes — shares its anchor, alignment, and per-key transform channels.
Lofting sweeps one or more 2D cross-section profiles along the lane to build a continuous surface — the tool for
bridges, tunnels, retaining walls, and multilevel interchange decks. Unlike the other
Generate Attributes (which repeat a mesh/component), lofting extrudes a shape, so the
result is a single watertight run that follows the road’s curvature, width, and the per-key transform channels
(Scale, Offset, Roll, width overrides, …).
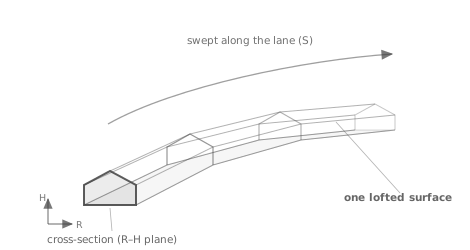
You draw a 2D cross-section in the road’s R–H plane; the attribute sweeps it along the lane (S) — following the road’s curve and width — into one continuous surface.
Add it and place keys with Attribute Mode. A Lofting profile is a Blueprint subclass of
the Lofting descriptor; create several subclasses for different shapes, and add multiple lofting attributes to the
same lane to build independent lofted meshes (e.g. a deck plus its parapets).
Size control
How large the lofted mesh is across its cross-section depends on each item’s Coordinate System:
Relative (Normalized) (default) — you draw the cross-section curve in a normalized −1 … +1 box that MetaRoad stretches onto the lane at bake, so the loft adapts to the road:
X = −1lands on the lane’s left edge andX = +1on its right edge (exactly as wide as the lane, following its width changes), andY = 1.0equals half the lane width, so the loft keeps its proportions as the road widens or narrows. The anchor position,Alignment,Alpha, andOverride Left/Right Widthbehave exactly as for every other Generate Attribute.Absolute (cm) — the curve’s X and Y are literal centimeters (X = offset from the reference line, Y = height above the surface), so the loft keeps a fixed real-world size regardless of lane width (alignment and width overrides are ignored).
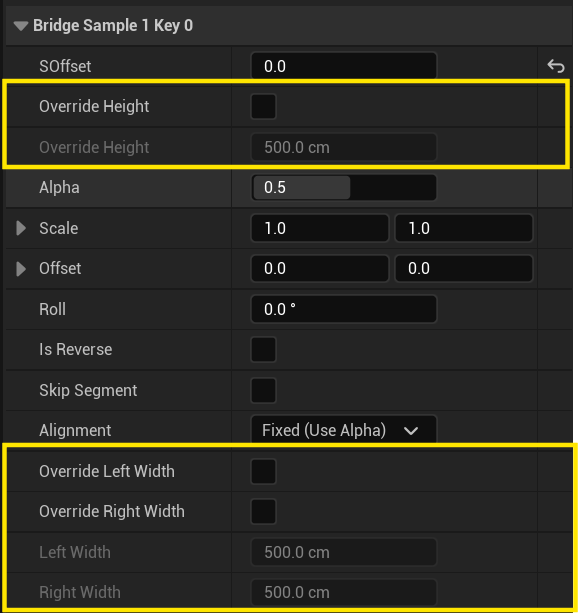
To give the loft a fixed height instead of scaling it with the lane, enable bOverrideHeight:
Field |
Default |
Description |
|---|---|---|
|
off |
Fix the lofted height instead of scaling it with the lane width |
|
500 cm |
With |
Create new Attribute
Create a new attribute from the Content Browser under the Meta Road category:
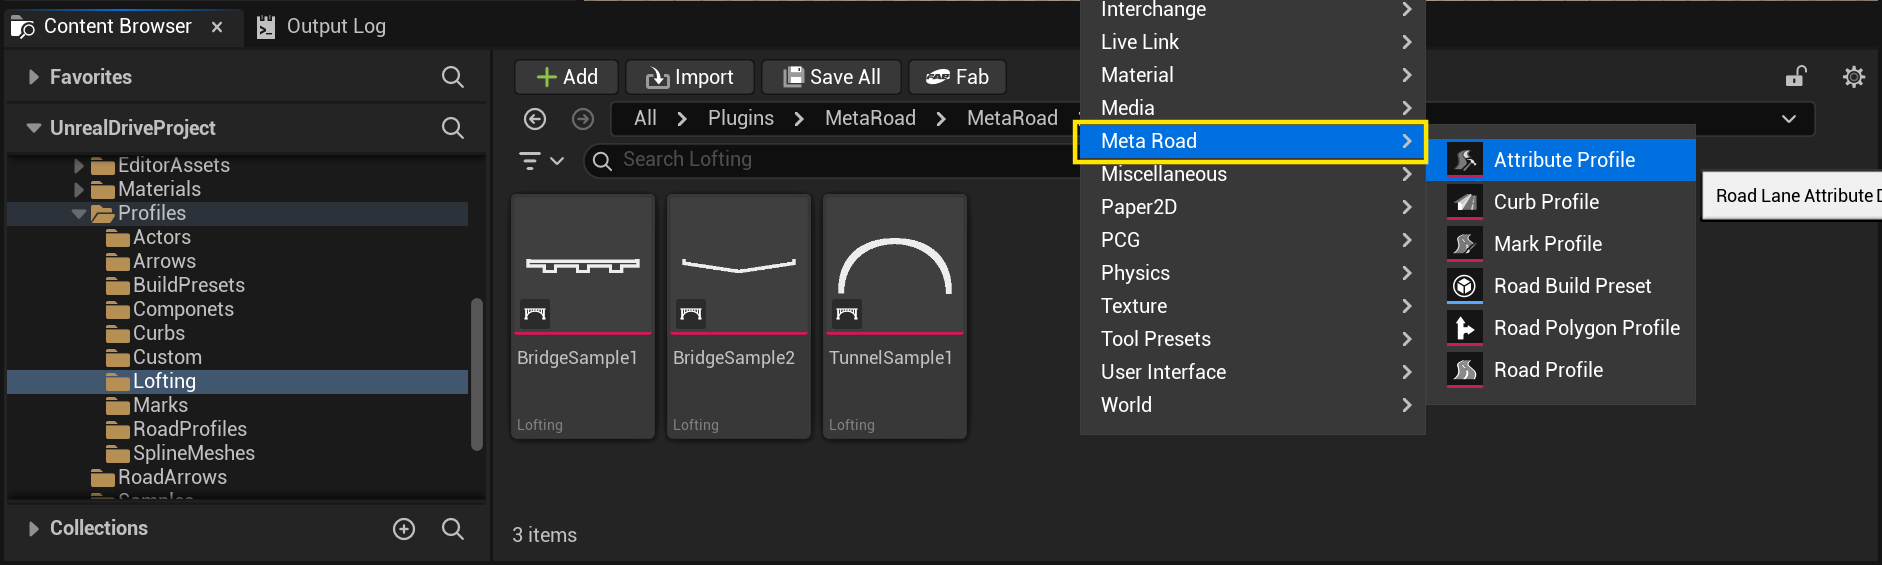
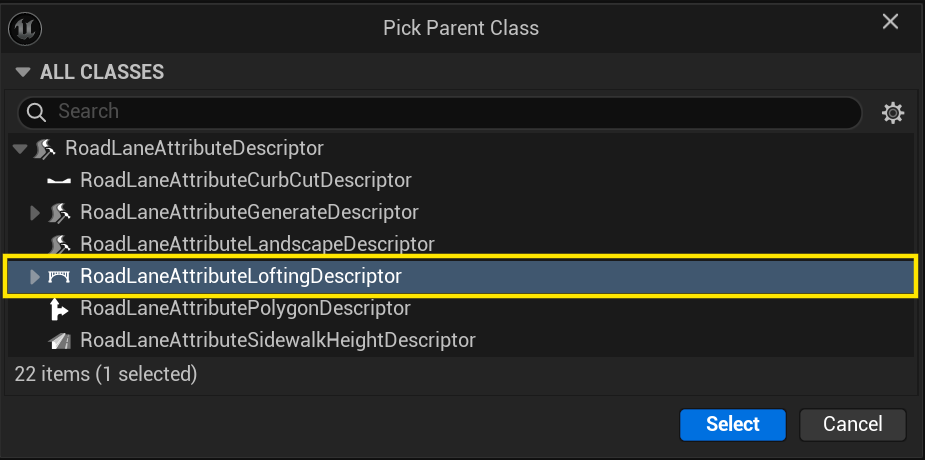
In the Pick Parent Class dialog choose RoadLaneAttributeLoftingDescriptor:
Lofting Attribute editor
Double-click a Lofting profile to open its dedicated 2D cross-section canvas — you draw the profile once and it is extruded along the road.
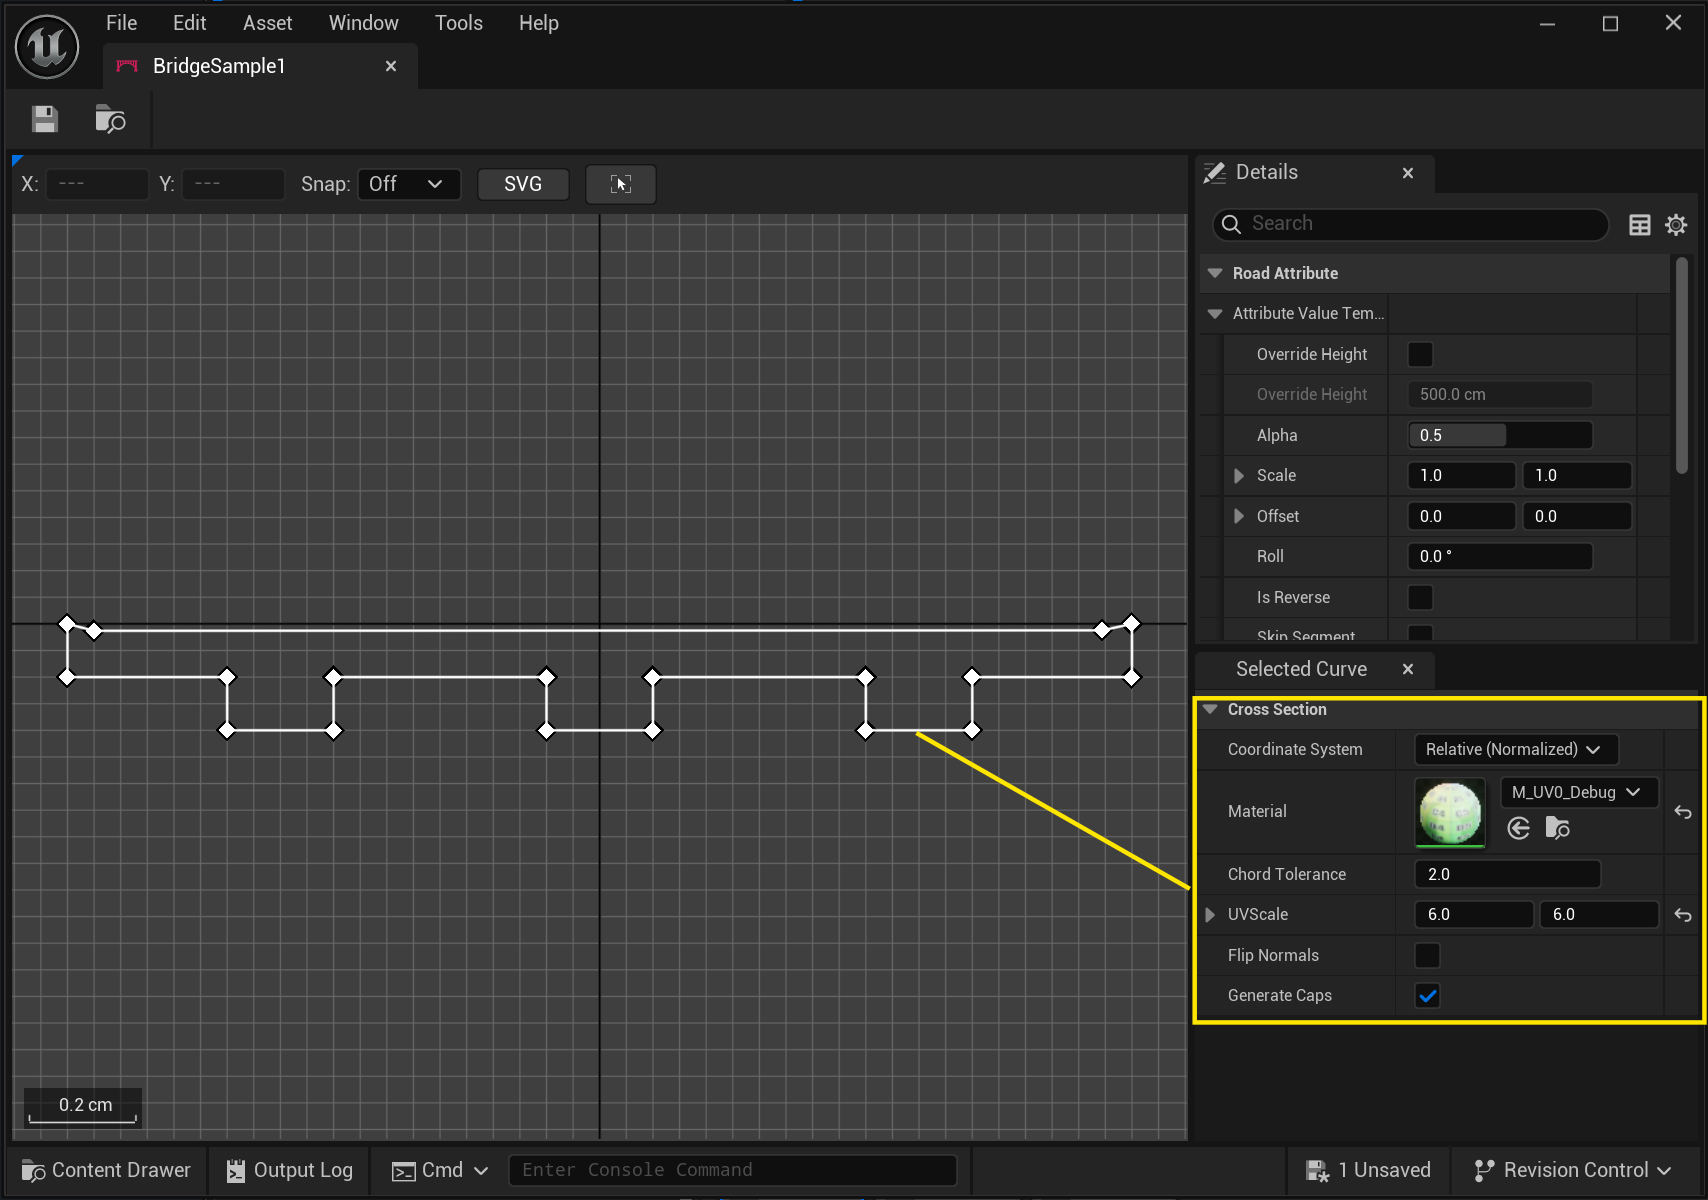
Canvas viewport — the 2D cross-section, drawn in the road’s R (horizontal) / H (vertical) plane. All cross-section items are shown together; the active item is highlighted.
Details panel — the descriptor: its value template and the list of cross-section items.
Selected Item panel — the properties of the item you are currently editing.
Canvas controls: LMB drag moves a point or its tangent handle; RMB opens a context menu to add/delete points and items; Scroll zooms; MMB / RMB drag pans.
Cross-section items
The profile is built from one or more cross-section items — each is a 2D curve plus a material. An open curve becomes an extruded shell (a deck, wall, or barrier); a closed curve becomes a tube (a rail or pipe). Add several items, each with its own material, to build a compound profile — for example a deck, its parapets, and a curb in a single Lofting attribute.
Item property |
Default |
Description |
|---|---|---|
|
— |
The 2D cross-section shape (a 2D spline). Open curve → an extruded shell; closed curve → a tube |
|
Relative |
|
|
— |
Material applied to this item’s mesh strip |
|
2 |
Curve → polyline tolerance [cm]; smaller = smoother |
|
(1, 1) |
UV tiling — X across the cross-section perimeter, Y along the road path |
|
off |
Reverse triangle winding (flip faces inward) |
|
on |
For closed curves only — triangulate end caps at each lofted segment |
Drag and Drop
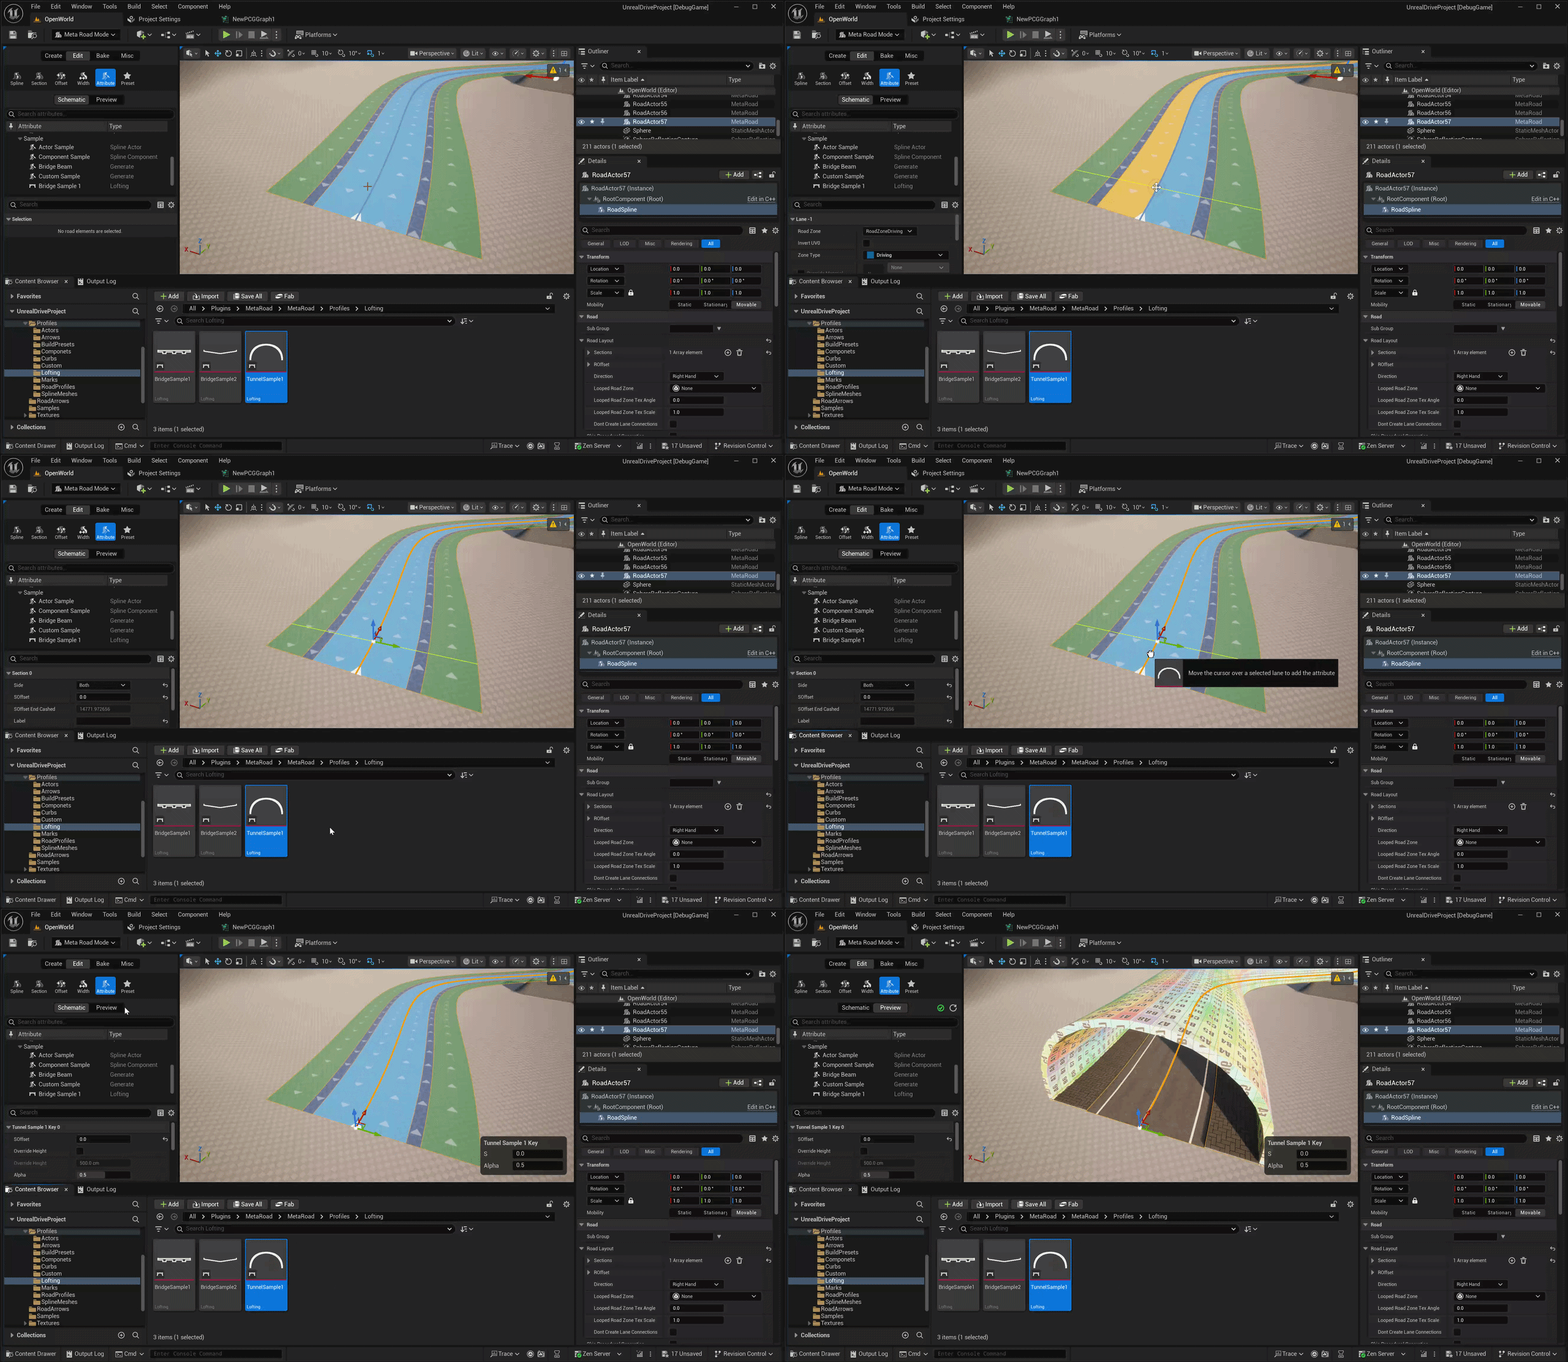
Drag a Lofting attribute profile from the Content Browser onto a road lane to add it directly:
Examples
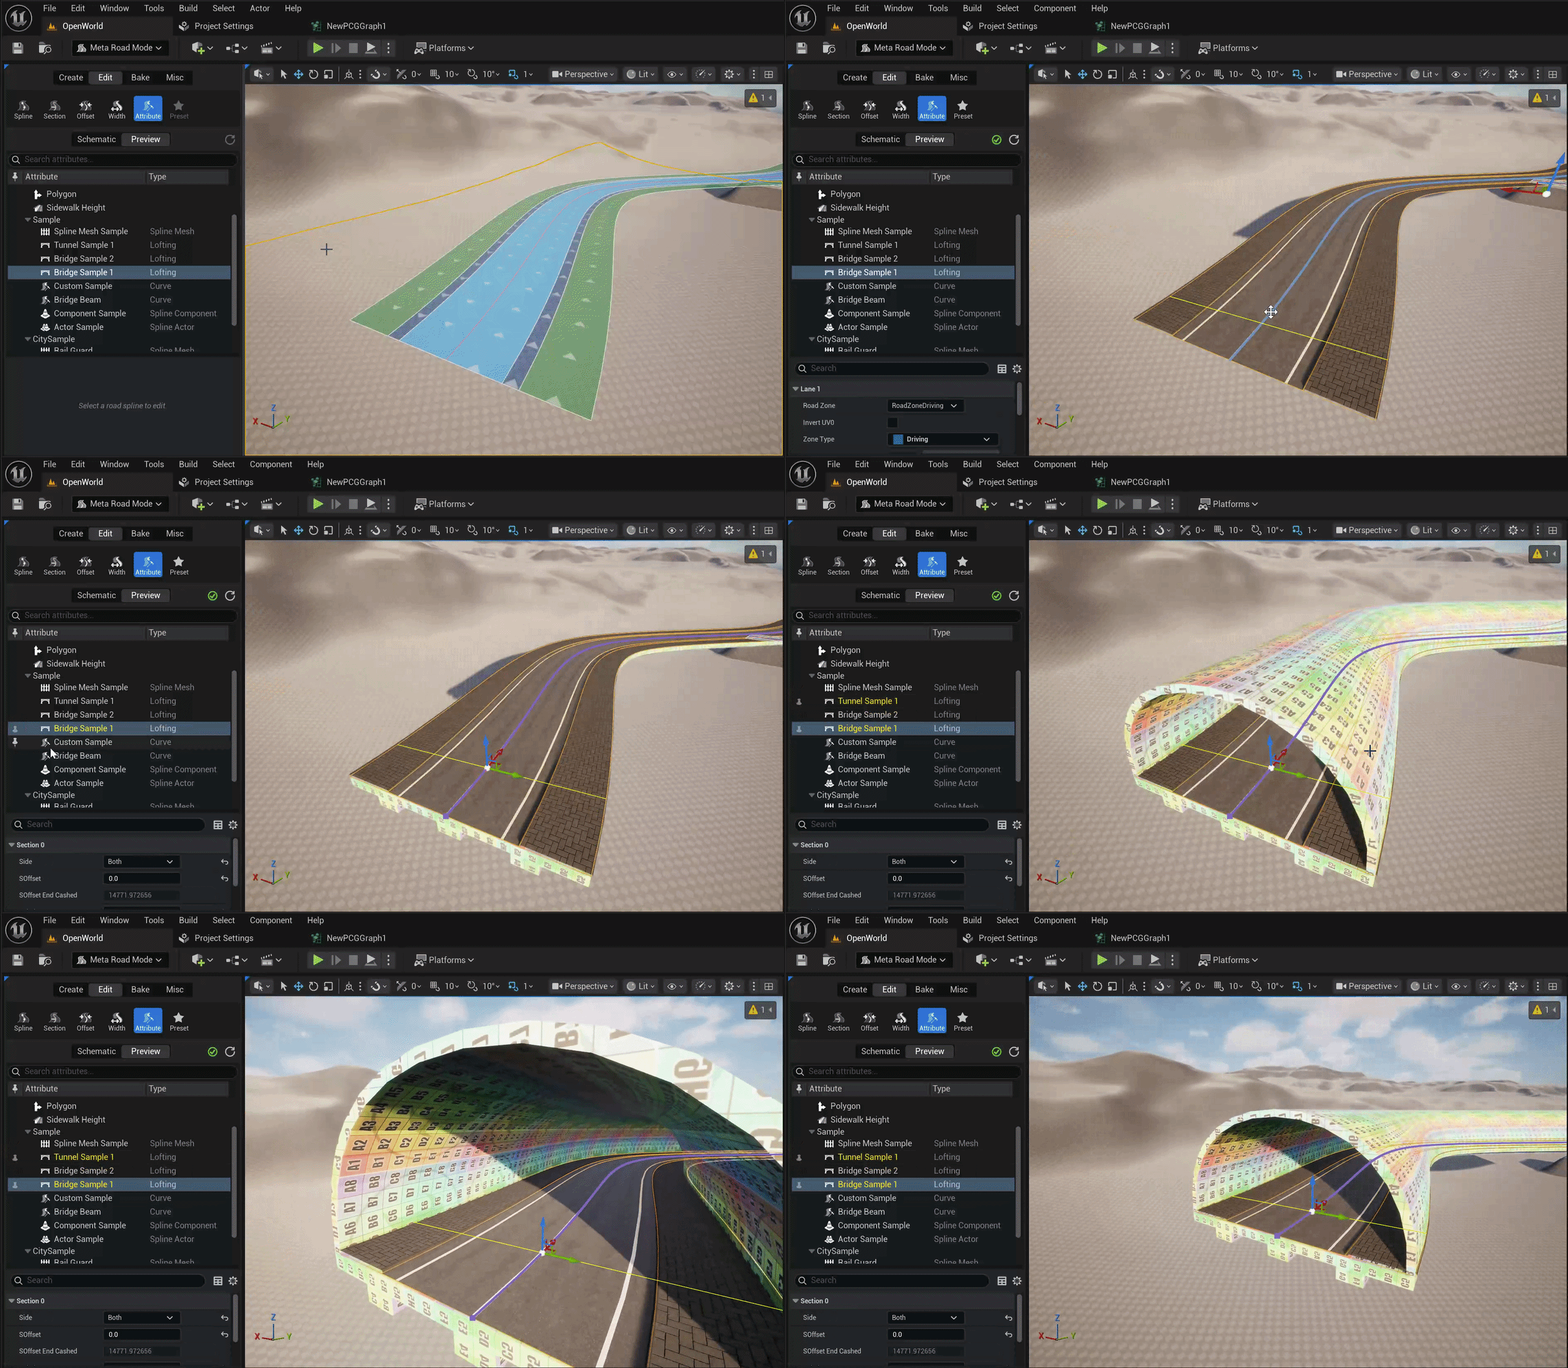
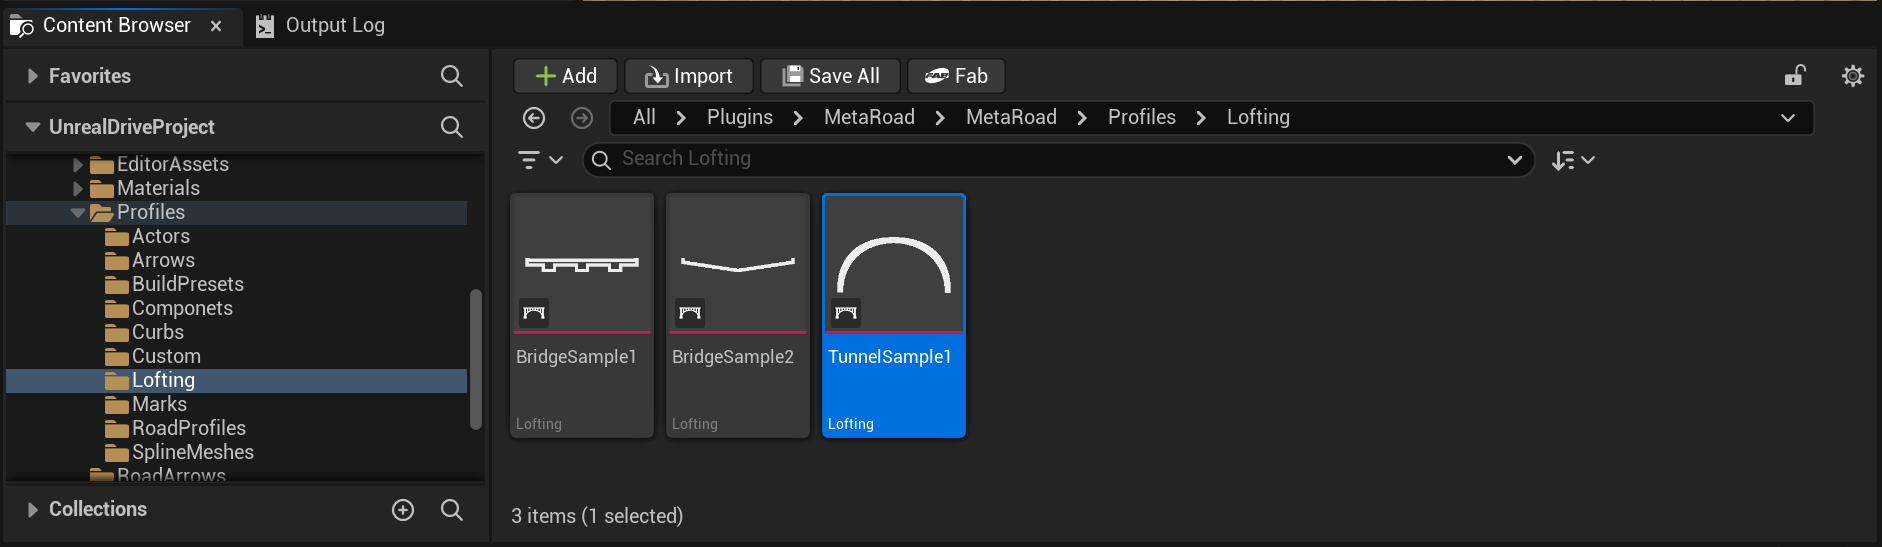
MetaRoad ships ready-made Lofting profiles in /MetaRoad/MetaRoad/Profiles/Lofting. Apply one directly, or open it
in the editor to see how its cross-section is assembled and use it as a starting point:
TunnelSample1— a tunnel.BridgeSample1,BridgeSample2— bridge decks.
See also
Generate Attributes — the base family Lofting belongs to (shared anchor / alignment / per-key transform channels).
Attribute Profile — how attribute assets are created in the Content Browser.
Attribute Mode — add the attribute and place keys along a lane.